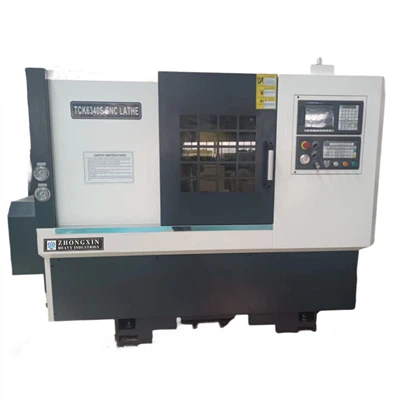
Hey there! As a supplier of gap bed lathes, I've had my fair share of hands - on experience with these machines. One of the common tasks that users often ask about is how to change the chuck on a gap bed lathe. In this blog, I'm gonna walk you through the whole process step - by - step.
First off, let's understand what a gap bed lathe is. A Gap Bed Engine Lathe is a versatile piece of equipment. It's got a removable section in the bed, which allows for the machining of larger diameter workpieces. One of the popular models we offer is the Gap Bed Lathe CS6250C. This lathe is known for its reliability and performance.
Why Change the Chuck?
There are a few reasons you might want to change the chuck on your gap bed lathe. Maybe you need a different type of chuck for a specific job. For example, if you're working on small, precision parts, a collet chuck might be more suitable. On the other hand, if you're dealing with large, irregularly shaped workpieces, a four - jaw independent chuck could be the way to go. Another reason could be that your current chuck is worn out or damaged and needs to be replaced.
Tools You'll Need
Before you start changing the chuck, make sure you have the right tools on hand. You'll need a chuck key, of course, to loosen and tighten the chuck bolts. A dial indicator can be very useful for aligning the new chuck properly. You'll also need a soft - faced hammer to gently tap the chuck into place. And don't forget a torque wrench to ensure that the chuck bolts are tightened to the correct specification.


Step 1: Prepare the Lathe
The first thing you need to do is make sure the lathe is turned off and unplugged. This is a safety measure to prevent any accidental start - up while you're working on the chuck. Next, clean the spindle nose and the mounting surface of the chuck. Any dirt or debris on these surfaces can affect the alignment and performance of the new chuck. Use a clean, dry cloth to wipe them down.
Step 2: Remove the Old Chuck
Now it's time to remove the old chuck. Insert the chuck key into the chuck and loosen the bolts. You might need to turn the key counter - clockwise. As you loosen the bolts, the chuck will start to come loose. Once the bolts are loose enough, you can use your hands to gently pull the chuck away from the spindle. Be careful, as chucks can be quite heavy. If the chuck is stuck, you can use a soft - faced hammer to give it a gentle tap around the edges. But be very careful not to damage the spindle or the chuck.
Step 3: Inspect the Spindle and Chuck
After removing the old chuck, take a close look at the spindle and the new chuck. Check for any signs of damage, such as cracks or excessive wear. If you notice any problems, it's a good idea to address them before installing the new chuck. Also, make sure that the new chuck is the correct size and type for your lathe.
Step 4: Install the New Chuck
Place the new chuck onto the spindle. Make sure it's aligned properly. You can use a dial indicator to check the alignment. The indicator should show a very small amount of runout. If the alignment is off, you can gently tap the chuck with a soft - faced hammer to adjust it. Once the chuck is aligned, insert the bolts and start tightening them with the chuck key. Don't fully tighten the bolts just yet.
Step 5: Tighten the Bolts
Now it's time to use the torque wrench to tighten the bolts to the correct specification. Refer to your lathe's manual for the recommended torque value. Tightening the bolts to the correct torque is crucial for the safe and proper operation of the chuck. Make sure to tighten the bolts evenly to avoid any uneven stress on the chuck.
Step 6: Test the Chuck
Once the bolts are tightened, it's time to test the chuck. Plug in the lathe and turn it on at a low speed. Check for any unusual noises or vibrations. If everything seems okay, you can start to increase the speed gradually. You can also try clamping a test piece in the chuck to make sure it holds securely.
Troubleshooting
If you encounter any problems during the chuck - changing process, don't panic. Here are a few common issues and how to solve them.
Chuck won't align properly: If the chuck is difficult to align, double - check the spindle and the chuck mounting surfaces for any dirt or damage. You might also need to adjust the position of the chuck more carefully.
Bolts won't tighten properly: Make sure you're using the correct size and type of bolts. Also, check that the bolt holes in the chuck and the spindle are clean and free of debris. If the bolts still won't tighten, there could be a problem with the threads. In this case, you might need to consult a professional.
Chuck vibrates during operation: This could be due to an improper alignment or a loose bolt. Stop the lathe immediately and check the alignment and the tightness of the bolts.
Conclusion
Changing the chuck on a gap bed lathe might seem like a daunting task, but with the right tools and a little patience, it's definitely doable. By following these steps, you can ensure that your new chuck is installed correctly and that your lathe will continue to perform at its best.
If you're in the market for a new gap bed lathe or need any replacement parts, don't hesitate to get in touch with us. We're here to help you find the right equipment for your needs and provide you with the support you need to keep it running smoothly. Whether you're a professional machinist or a hobbyist, we've got the products and expertise to serve you. So, feel free to reach out and start a conversation about your procurement needs.
References
- Lathe Operation Manuals
- Machining Handbook