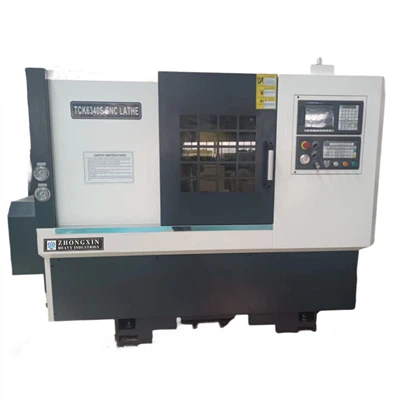
Hey there! I'm a supplier of Gap Bed Engine Lathes, and I know that installing one of these machines can seem like a daunting task. But don't worry, I'm here to walk you through the process step by step. By the end of this blog, you'll be well on your way to having your very own Gap Bed Engine Lathe up and running.
Step 1: Preparation
Before you even start thinking about installing your Gap Bed Engine Lathe, you need to make sure you've got everything ready. First off, find a suitable location for the lathe. It should be a flat, stable surface that can support the weight of the machine. You also want to make sure there's enough space around it for you to move freely and access all the controls.
Next, gather all the tools you'll need for the installation. This usually includes wrenches, screwdrivers, and a level. It's a good idea to lay them out in an organized way so you can easily find what you need when you need it.
Also, take the time to read through the installation manual that came with your Gap Bed Engine Lathe. This will give you a clear understanding of the process and any specific requirements for your particular model.
Step 2: Unpacking and Inspection
Once you've got your location and tools ready, it's time to unpack the lathe. Carefully remove all the parts from the packaging, being mindful not to damage anything. As you unpack, check each part for any signs of damage or missing pieces. If you notice anything wrong, contact the supplier right away.
It's also a good idea to clean all the parts before installation. Use a clean cloth to wipe away any dirt or debris that may have accumulated during shipping. This will help ensure a smooth installation process and prevent any potential issues down the line.
Step 3: Base Installation
The first major step in the installation process is to install the base of the lathe. Start by placing the base on the prepared surface and using a level to make sure it's perfectly horizontal. If it's not level, adjust the leveling feet until it is.
Once the base is level, secure it to the floor using the appropriate bolts or anchors. Make sure the base is firmly attached to prevent any movement during operation. This is crucial for the stability and accuracy of the lathe.
Step 4: Bed Installation
After the base is installed, it's time to install the bed of the lathe. Carefully lift the bed onto the base and align it with the mounting holes. Use the bolts provided to secure the bed to the base, making sure to tighten them evenly to prevent any warping.
Once the bed is attached, use a straightedge to check its alignment. The bed should be perfectly straight from end to end. If it's not, you may need to make some adjustments by loosening the bolts slightly and repositioning the bed.
Step 5: Headstock and Tailstock Installation
The headstock and tailstock are two of the most important components of the lathe. The headstock houses the spindle and the drive mechanism, while the tailstock provides support for the workpiece.
To install the headstock, carefully lift it onto the bed and align it with the mounting holes. Use the bolts provided to secure it to the bed, making sure to tighten them evenly.
Next, install the tailstock in the same way. Make sure it can move freely along the bed and that it's properly aligned with the headstock. You may need to adjust the position of the tailstock to ensure accurate machining.
Step 6: Drive System Installation
The drive system of the lathe is responsible for powering the spindle and providing the necessary speed and torque for machining. This usually includes a motor, belts, and pulleys.


Start by installing the motor in the designated location on the base. Use the bolts provided to secure it in place, making sure it's properly aligned with the drive pulley on the headstock.
Next, install the belts and pulleys according to the manufacturer's instructions. Make sure the belts are properly tensioned to prevent slipping or excessive wear. You may need to adjust the position of the motor or the pulleys to achieve the correct tension.
Step 7: Electrical Installation
Once the mechanical components are installed, it's time to connect the electrical system. This includes wiring the motor, control panel, and any other electrical components.
Before you start working on the electrical system, make sure the power is turned off at the main breaker. Follow the wiring diagram provided in the installation manual to connect the wires correctly. Use wire connectors and electrical tape to secure the connections and prevent any short circuits.
After the wiring is complete, double-check all the connections to make sure they're secure. Then, turn on the power and test the lathe to make sure everything is working properly.
Step 8: Tooling and Accessories Installation
Now that the lathe is installed and running, it's time to install the tooling and accessories. This includes the cutting tools, chucks, and other attachments that you'll use for machining.
Start by installing the chuck on the spindle. Make sure it's properly centered and tightened to prevent any runout. Then, install the cutting tools in the tool post, making sure they're properly aligned and adjusted for the desired cutting depth and feed rate.
You may also want to install other accessories such as a coolant system, chip conveyor, or digital readout. These can enhance the performance and functionality of the lathe.
Step 9: Testing and Calibration
Once all the components are installed, it's time to test the lathe and make any necessary calibrations. Start by running the lathe at a low speed and checking for any abnormal noises or vibrations. If you notice anything wrong, stop the lathe immediately and investigate the cause.
Next, perform some test cuts on a piece of scrap material to check the accuracy of the lathe. Measure the dimensions of the workpiece and compare them to the desired specifications. If there are any discrepancies, you may need to make some adjustments to the tooling, speed, or feed rate.
Finally, calibrate the lathe's controls to ensure accurate and consistent operation. This may include adjusting the speed settings, feed rates, and other parameters.
Step 10: Training and Safety
Before you start using the lathe on a regular basis, it's important to receive proper training. This will help you understand how to operate the lathe safely and effectively. You may want to consider attending a training course or having a professional technician provide on-site training.
In addition to training, it's also crucial to follow all safety guidelines when using the lathe. This includes wearing appropriate safety gear such as safety glasses, gloves, and ear protection. Make sure the lathe is properly grounded and that all guards and safety devices are in place.
Conclusion
Installing a Gap Bed Engine Lathe may seem like a complex process, but by following these steps and taking your time, you can do it successfully. Remember to read the installation manual carefully, use the right tools, and follow all safety guidelines.
If you have any questions or need further assistance during the installation process, don't hesitate to contact us. We're here to help you every step of the way. And if you're interested in purchasing a Gap Bed Lathe CS6250C or any other Gap Bed Engine Lathe, feel free to reach out to us for more information and to discuss your specific needs. We look forward to working with you!
References
- Manufacturer's Installation Manual for Gap Bed Engine Lathe
- Industry Standards for Lathe Installation and Operation