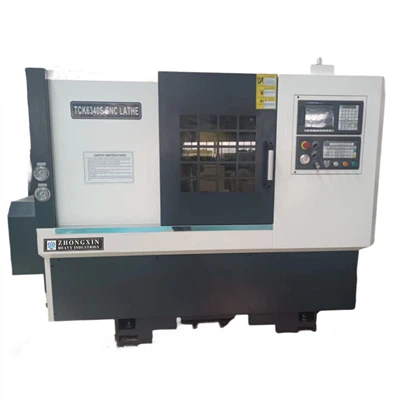
Hey there! As a supplier of CNC Lathe Chucks, I often get asked about various aspects of these machines, and one common question is how to replace the jaws of a CNC lathe chuck. In this blog, I'll walk you through the process step by step, sharing some tips and tricks along the way.
Why Replace the Jaws?
First off, you might be wondering why you'd need to replace the jaws of your CNC lathe chuck. Well, over time, the jaws can wear out due to constant use, or you might need to change them to accommodate different workpiece sizes or shapes. Maybe you're working on a new project that requires a different type of grip, or the existing jaws have been damaged. Whatever the reason, replacing the jaws is a relatively straightforward process that can make a big difference in your machining operations.
Tools You'll Need
Before you start, gather the necessary tools. You'll typically need a set of wrenches, a chuck key, a dial indicator (optional but useful for precision), and a clean work surface. Make sure you have the right replacement jaws for your specific chuck model. You can find these from us as a CNC Lathe Chucks supplier, or you can double - check the specifications and source them from a reliable vendor.
Step 1: Safety First
Safety should always be your top priority. Before you start working on the chuck, turn off the CNC lathe and disconnect it from the power source. This will prevent any accidental startup that could cause serious injury. Also, wear appropriate safety gear, like safety glasses and gloves, to protect yourself from any debris or sharp edges.
Step 2: Remove the Old Jaws
Most CNC lathe chucks have a keyway or a set of bolts that hold the jaws in place. Use the appropriate wrench or chuck key to loosen the bolts or release the locking mechanism. Start by removing the outermost jaws first. You may need to turn the chuck key counter - clockwise to open the chuck slightly and make it easier to remove the jaws.
Once the bolts are loose, carefully lift the old jaws out of the chuck. Be gentle as you do this, as the jaws can be heavy and might cause damage if dropped. Place the old jaws in a safe place, as you might want to keep them for reference or in case you need to reuse them later.
Step 3: Clean the Chuck
With the old jaws removed, it's a good idea to clean the chuck. Use a clean cloth or a brush to remove any chips, dirt, or debris that may have accumulated in the jaw slots and the chuck body. You can also use a mild solvent to clean stubborn dirt, but make sure to dry the chuck thoroughly before proceeding.
Step 4: Inspect the Chuck
While the chuck is clean, take a moment to inspect it for any signs of wear or damage. Look for cracks, excessive wear on the jaw slots, or any other issues that could affect the performance of the new jaws. If you notice any problems, it's best to address them before installing the new jaws. You can consult with us as your CNC Lathe Chucks supplier for advice on repairs or replacements.
Step 5: Install the New Jaws
Now it's time to install the new jaws. Start by aligning the new jaws with the jaw slots in the chuck. Make sure the jaws are inserted in the correct orientation, as some chucks have specific markings or keyways to ensure proper alignment.
Once the jaws are aligned, insert them into the slots. You may need to use the chuck key to close the chuck slightly to hold the jaws in place while you tighten the bolts. Use the appropriate wrench to tighten the bolts securely, but be careful not to overtighten them, as this could damage the jaws or the chuck.
Step 6: Check for Proper Alignment
After installing the new jaws, it's important to check for proper alignment. You can use a dial indicator to measure the runout of the jaws. Place the dial indicator on the workpiece or a test piece and rotate the chuck slowly. The indicator should show minimal variation in the readings, indicating that the jaws are properly aligned.
If the alignment is off, you may need to make some adjustments. Loosen the bolts slightly and re - position the jaws until you achieve the desired alignment. Then, tighten the bolts again and re - check the alignment.
Step 7: Test the Chuck
Once you're satisfied with the alignment, it's time to test the chuck. Reconnect the CNC lathe to the power source and turn it on. Start the lathe at a low speed and run a test piece through the chuck. Check that the chuck grips the workpiece securely and that there are no vibrations or unusual noises.
If everything looks and sounds good, you're ready to start using your CNC lathe with the new jaws. You can now proceed with your machining operations, knowing that your chuck is in good working condition.
Related CNC Lathe Machines
If you're in the market for a new CNC lathe machine, we have some great options. The Ck6132 CNC Lathe is a popular choice for its versatility and precision. It can handle a wide range of machining tasks and is suitable for both small - scale and medium - scale production.
For heavy - duty applications, the Cnc Lathe Machine Heavy Duty is a great option. It's built to withstand high - torque and heavy cutting loads, making it ideal for industries like automotive and aerospace.
If you prefer a horizontal setup, the Horizontal CNC Lathe Machine offers excellent stability and accuracy. It's perfect for long - shaft machining and other horizontal - axis operations.


Contact Us for Your Needs
If you have any questions about replacing the jaws of your CNC lathe chuck, or if you're interested in purchasing new chucks or CNC lathe machines, don't hesitate to contact us. We're here to help you with all your CNC machining needs. Whether you're a small - business owner or a large - scale manufacturer, we have the products and expertise to support your operations.
References
- "CNC Lathe Operations Manual" - General guide on CNC lathe operations and maintenance.
- "Machinery's Handbook" - A comprehensive reference for machining and manufacturing processes.