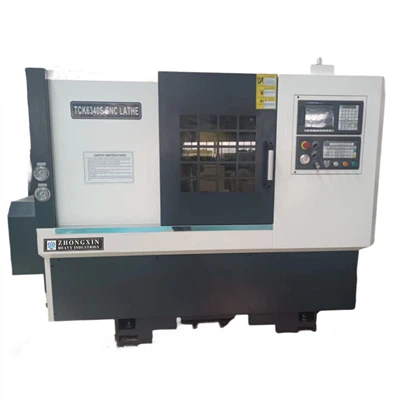
Setting up a workpiece in a horizontal CNC lathe machine is a critical process that requires precision, knowledge, and the right techniques. As a supplier of Horizontal CNC Lathe Machines, I've witnessed firsthand the importance of proper workpiece setup in achieving high-quality machining results. In this blog post, I'll guide you through the steps and considerations for setting up a workpiece in a horizontal CNC lathe machine.
Understanding the Basics of a Horizontal CNC Lathe Machine
Before diving into the workpiece setup process, it's essential to have a basic understanding of a horizontal CNC lathe machine. A horizontal CNC lathe is a machining tool that rotates a workpiece on its axis while a cutting tool is fed into it to remove material and create the desired shape. These machines are known for their accuracy, efficiency, and versatility, making them suitable for a wide range of applications in various industries.
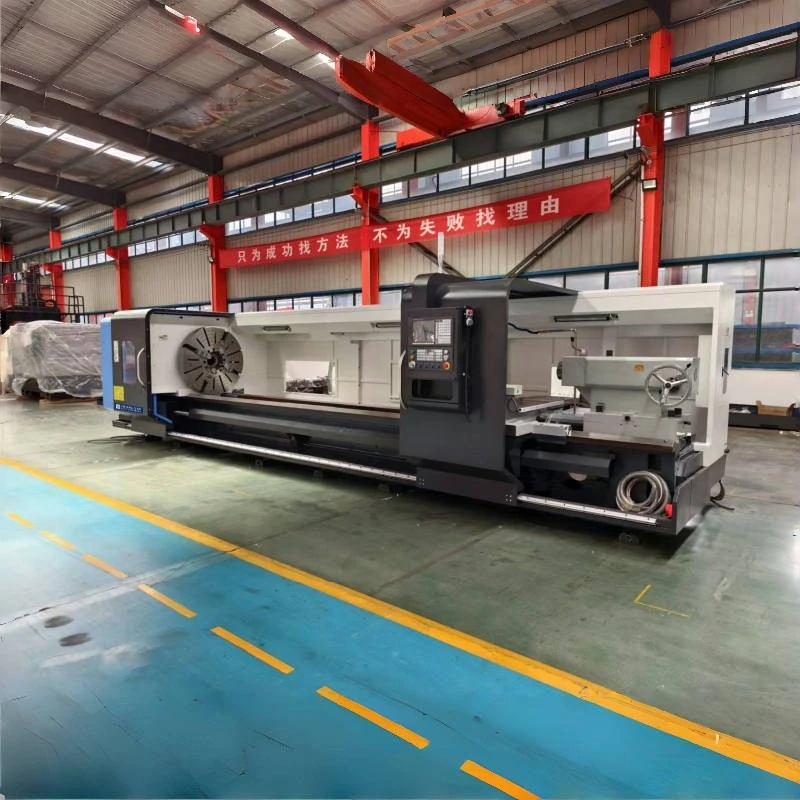
We offer a variety of horizontal CNC lathe machines, including Cnc Lathe Machine Heavy Duty, Precision CNC Lathe, and Small Cnc Lathe. Each machine is designed to meet different machining requirements and budgets, ensuring that you can find the perfect solution for your needs.
Step 1: Select the Right Workholding Device
The first step in setting up a workpiece in a horizontal CNC lathe machine is to select the right workholding device. The workholding device is responsible for securing the workpiece in place during the machining process, ensuring that it remains stable and accurately positioned. There are several types of workholding devices available, including chucks, collets, fixtures, and mandrels.
- Chucks: Chucks are the most common type of workholding device used in horizontal CNC lathe machines. They come in various sizes and configurations, including three-jaw chucks, four-jaw chucks, and hydraulic chucks. Three-jaw chucks are self-centering, making them ideal for round workpieces, while four-jaw chucks allow for more precise positioning and are suitable for irregularly shaped workpieces. Hydraulic chucks provide high clamping force and are often used for heavy-duty machining applications.
- Collets: Collets are another popular workholding device that offers high accuracy and repeatability. They are typically used for small-diameter workpieces and can provide a more secure grip than chucks. Collets come in various sizes and types, including ER collets, hydraulic collets, and pneumatic collets.
- Fixtures: Fixtures are custom-made workholding devices that are designed to hold specific workpieces in place. They are often used for complex or irregularly shaped workpieces that cannot be easily held by chucks or collets. Fixtures can be made from a variety of materials, including aluminum, steel, and plastic, and can be designed to accommodate different machining operations.
- Mandrels: Mandrels are used to hold workpieces that have a central hole, such as gears, pulleys, and bushings. They are typically inserted into the hole of the workpiece and secured in place using a clamping mechanism. Mandrels come in various sizes and types, including expanding mandrels, segmented mandrels, and hydraulic mandrels.
When selecting a workholding device, it's important to consider the size, shape, and material of the workpiece, as well as the machining operation that will be performed. You should also ensure that the workholding device is compatible with your horizontal CNC lathe machine and can provide the necessary clamping force and accuracy.
Step 2: Prepare the Workpiece
Once you have selected the right workholding device, the next step is to prepare the workpiece for setup. This involves cleaning the workpiece to remove any dirt, oil, or debris that may affect the clamping force or accuracy of the workholding device. You should also inspect the workpiece for any defects or damage that may affect the machining process.
If the workpiece has a rough surface or irregular shape, you may need to perform some preliminary machining operations, such as facing, turning, or boring, to create a smooth and flat surface for the workholding device. This will help to ensure that the workpiece is properly centered and secured in place during the machining process.
Step 3: Mount the Workholding Device on the Lathe
After preparing the workpiece, the next step is to mount the workholding device on the lathe. This involves attaching the workholding device to the spindle of the lathe using the appropriate mounting hardware. You should ensure that the workholding device is properly aligned with the spindle and that the mounting hardware is tightened securely to prevent any movement or vibration during the machining process.
When mounting the workholding device, it's important to follow the manufacturer's instructions and guidelines to ensure that the installation is performed correctly. You should also use a torque wrench to tighten the mounting hardware to the recommended torque specifications to prevent over-tightening or under-tightening.
Step 4: Install the Workpiece in the Workholding Device
Once the workholding device is mounted on the lathe, the next step is to install the workpiece in the workholding device. This involves inserting the workpiece into the workholding device and tightening the clamping mechanism to secure it in place. You should ensure that the workpiece is properly centered and aligned with the axis of the spindle to prevent any runout or eccentricity during the machining process.
When installing the workpiece, it's important to use the appropriate clamping force to ensure that the workpiece is securely held in place without causing any damage or deformation. You should also avoid over-tightening the clamping mechanism, as this can cause the workpiece to become distorted or damaged.
Step 5: Set the Tooling and Machining Parameters
After installing the workpiece in the workholding device, the next step is to set the tooling and machining parameters for the machining operation. This involves selecting the appropriate cutting tools, such as turning tools, boring tools, or threading tools, and installing them in the tool holder. You should ensure that the cutting tools are properly aligned with the workpiece and that the tool holder is securely tightened to prevent any movement or vibration during the machining process.
When setting the machining parameters, it's important to consider the material of the workpiece, the type of machining operation, and the capabilities of the horizontal CNC lathe machine. You should also refer to the cutting tool manufacturer's recommendations and guidelines to ensure that you are using the appropriate cutting speed, feed rate, and depth of cut for the machining operation.
Step 6: Perform a Test Run
Before starting the actual machining operation, it's important to perform a test run to ensure that the workpiece is properly setup and that the machining parameters are correct. This involves running the horizontal CNC lathe machine at a low speed and performing a few test cuts to check the accuracy and quality of the machining process. You should also check the clamping force of the workholding device and the alignment of the cutting tools to ensure that everything is working properly.

If you encounter any issues or problems during the test run, you should stop the machine immediately and make the necessary adjustments. This may involve re-aligning the workholding device, adjusting the machining parameters, or replacing the cutting tools.
Step 7: Start the Machining Operation
Once you have completed the test run and are satisfied with the setup and machining parameters, the next step is to start the actual machining operation. This involves running the horizontal CNC lathe machine at the appropriate speed and feed rate and performing the machining operation according to the program that has been loaded into the CNC controller.
During the machining process, it's important to monitor the machine and the workpiece to ensure that everything is working properly. You should also check the cutting tools regularly to ensure that they are in good condition and that the cutting edges are sharp. If you notice any signs of wear or damage to the cutting tools, you should replace them immediately to prevent any issues or problems with the machining process.
Step 8: Inspect the Machined Workpiece
After completing the machining operation, the final step is to inspect the machined workpiece to ensure that it meets the required specifications and quality standards. This involves measuring the dimensions of the workpiece using a variety of measuring tools, such as calipers, micrometers, or gauges, and comparing them to the design specifications. You should also check the surface finish of the workpiece to ensure that it is smooth and free of any defects or imperfections.
If the machined workpiece does not meet the required specifications or quality standards, you may need to perform some additional machining operations or make some adjustments to the setup or machining parameters. This may involve re-machining the workpiece, adjusting the cutting tools, or changing the workholding device.
Conclusion
Setting up a workpiece in a horizontal CNC lathe machine is a critical process that requires precision, knowledge, and the right techniques. By following the steps and considerations outlined in this blog post, you can ensure that your workpiece is properly setup and that you achieve high-quality machining results.
As a supplier of Horizontal CNC Lathe Machines, we are committed to providing our customers with the best products and services. If you have any questions or need further assistance with setting up a workpiece in a horizontal CNC lathe machine, please don't hesitate to contact us. We would be happy to help you find the perfect solution for your needs and provide you with the support and guidance you need to succeed.
References
- "CNC Machining Handbook" by Peter Zelinski
- "Modern Machining Technology" by Robert L. Norton
- "Manufacturing Engineering and Technology" by Serope Kalpakjian and Steven R. Schmid