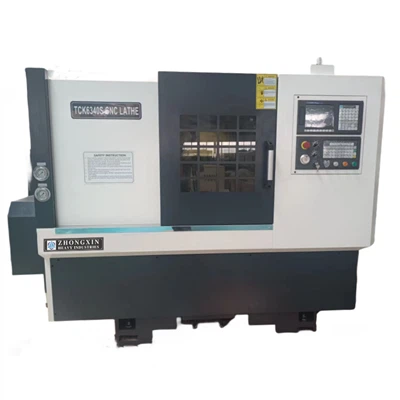
Drilling operations on a manual lathe are a fundamental skill for machinists and hobbyists alike. As a supplier of manual lathes, I understand the importance of providing clear guidance on how to perform these operations safely and effectively. In this blog post, I will walk you through the step-by-step process of drilling on a manual lathe, from setup to execution.
Understanding the Manual Lathe
Before diving into the drilling process, it's essential to have a basic understanding of the manual lathe components involved. A manual lathe typically consists of a bed, headstock, tailstock, carriage, and cross-slide. The headstock houses the spindle, which rotates the workpiece, while the tailstock holds the drill bit or other cutting tools. The carriage and cross-slide allow for precise movement of the cutting tool along the workpiece.
When selecting a manual lathe for drilling operations, consider factors such as precision, power, and versatility. Our High Precision Manual Lathe is designed to meet the needs of professional machinists, offering exceptional accuracy and reliability. For those on a budget, our Manual Lathe For Sale provides a cost-effective solution without compromising on quality.
Preparing the Workpiece
The first step in any drilling operation is to prepare the workpiece. This involves selecting the appropriate material, cutting it to the desired length, and securing it in the lathe chuck. Make sure the workpiece is centered and tightened securely to prevent it from moving during the drilling process.


Next, mark the center of the workpiece where you want to drill the hole. You can use a center punch or a scribe to create a small indentation. This will help guide the drill bit and prevent it from wandering off course.
Selecting the Drill Bit
Choosing the right drill bit is crucial for achieving accurate and clean holes. Consider the material of the workpiece, the size of the hole, and the type of lathe you are using. High-speed steel (HSS) drill bits are suitable for most general-purpose drilling applications, while carbide drill bits are recommended for harder materials.
Ensure that the drill bit is sharp and in good condition. A dull or damaged drill bit can cause poor hole quality, excessive heat, and even breakage. You may also need to use a drill bit with the appropriate point angle for the material you are drilling. For example, a 118-degree point angle is commonly used for drilling steel, while a 135-degree point angle is better for aluminum.
Mounting the Drill Bit
Once you have selected the drill bit, it's time to mount it in the tailstock. First, remove the tailstock quill by loosening the locking nut and turning the handwheel counterclockwise. Insert the drill bit into the quill, making sure it fits snugly. Then, tighten the locking nut to secure the drill bit in place.
Adjust the position of the tailstock so that the drill bit is aligned with the center mark on the workpiece. You can use the tailstock handwheel to move it forward or backward and the cross-slide handwheel to adjust it left or right. Once the drill bit is properly aligned, lock the tailstock in place.
Setting the Speed and Feed
The speed and feed rate of the lathe are critical factors in drilling operations. The speed refers to the rotational speed of the spindle, while the feed rate determines how fast the drill bit advances into the workpiece.
The appropriate speed and feed rate depend on several factors, including the material of the workpiece, the size of the drill bit, and the type of lathe you are using. As a general rule, you should use a slower speed for larger drill bits and harder materials. You can refer to the lathe's manual or a machining handbook for recommended speed and feed rates.
To set the speed, adjust the belt or gear settings on the headstock. Most manual lathes have a range of speeds to choose from. Once you have selected the appropriate speed, engage the spindle by turning on the lathe.
The feed rate can be adjusted using the feed control lever on the carriage. Start with a slow feed rate and gradually increase it as needed. Be careful not to feed the drill bit too quickly, as this can cause the drill bit to break or the hole to become rough.
Drilling the Hole
With the workpiece prepared, the drill bit mounted, and the speed and feed rate set, you are ready to start drilling the hole. Turn on the lathe and let the spindle reach the desired speed. Then, slowly advance the drill bit into the workpiece using the tailstock handwheel.
Apply steady pressure to the handwheel to ensure a smooth and consistent feed. As the drill bit penetrates the workpiece, you may notice some chips being produced. This is normal and indicates that the drill bit is cutting effectively.
Keep an eye on the drill bit and the workpiece for any signs of overheating, excessive vibration, or unusual noise. If you encounter any problems, stop the lathe immediately and investigate the cause.
Once the drill bit has reached the desired depth, slowly retract it from the workpiece by turning the tailstock handwheel clockwise. Turn off the lathe and remove the workpiece from the chuck.
Deburring and Finishing
After drilling the hole, you may need to deburr the edges to remove any sharp or rough edges. You can use a deburring tool or a file to smooth the edges of the hole.
Depending on the requirements of your project, you may also need to perform additional finishing operations, such as reaming or tapping. Reaming is a process of enlarging and finishing a drilled hole to a precise size and surface finish. Tapping is used to create internal threads in a hole.
Safety Precautions
Drilling operations on a manual lathe can be dangerous if proper safety precautions are not taken. Here are some important safety tips to keep in mind:
- Always wear appropriate personal protective equipment (PPE), including safety glasses, gloves, and a face shield.
- Make sure the lathe is properly grounded and in good working condition.
- Keep your hands and clothing away from the moving parts of the lathe.
- Do not touch the drill bit or the workpiece while the lathe is running.
- Use a coolant or lubricant to reduce heat and friction during drilling.
- Do not force the drill bit or apply excessive pressure.
- Follow the manufacturer's instructions and guidelines for operating the lathe.
Conclusion
Performing drilling operations on a manual lathe requires careful preparation, proper tool selection, and attention to detail. By following the steps outlined in this blog post and taking the necessary safety precautions, you can achieve accurate and clean holes in your workpieces.
If you are interested in purchasing a manual lathe or have any questions about drilling operations, please feel free to [contact us](insert contact details link here). Our team of experts is ready to assist you in finding the right lathe for your needs and providing you with the support and guidance you need to succeed.
References
- "Machinery's Handbook," Industrial Press Inc.
- "The ABCs of Manual Lathe Operations," by John Doe
- "Drilling Techniques for Manual Lathes," by Jane Smith